Automated regression testing of Chromecast using Cucumber, JRuby and Rukuli

As you may know, i work as a Developer In Test for Media Playout at the BBC. We enable audio and video playout on the web (desktop, tablet and mobile) using our Standard Media Player.

We recently added support for Chromecast, and i want to write a bit about how i automated testing for it.

Chromecast HDMI dongle

Chromecast HDMI dongle

Chromecast is a HDMI dongle that plugs into a normal television and adds connected TV functionality. The neat thing is you can control it from your laptop, tablet or mobile using the media apps that you already know, such as YouTube, Netflix and now BBC iPlayer. Google also provides an API so that new Chromecast apps can be written all the time.

So how do you test a Chromecast? Well, personally i like to test things from an user’s point of view, actually clicking things and observing what happens as a result. But there’s only so far you can take this. I don’t want to rely on a television having a Chromecast being plugged in all the time and on the same network so that i can talk to it.

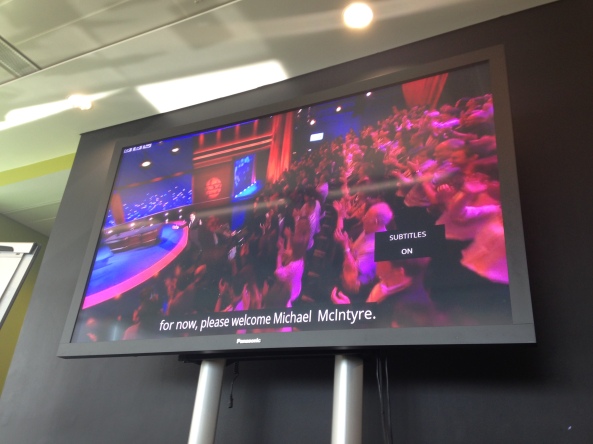
Though i’ve got to say .. it would be quite awesome to use a television 2 metres wide for my automated regression testing! :p

About to start casting

About to start casting

I didn’t need to test the Chromecast receiver app; that had already been written and tested by the guys in Salford for use by the iOS iPlayer app. I realised, what we actually care about is the communication between our player and the Chromecast. And there is a well documented Chromecast API. So with the help of colleagues Tim Hewitt and Wyell Hanna, i set about creating a fake Chromecast. Pretty much a bit of javascript that would respond in the same way as a real Chromecast, so that we could test how our player would respond to it.

And now i present to you .. the fake Chromecast!

https://gist.github.com/sermoa/10988494

A lot of it is empty methods that are neccessary to the API. But there are some neat tricks here too. I’ll talk you through a few of the more interesting bits.

Firstly we need to load the fake Chromecast into the page. We can achieve this with a @chromecast tag and a Before hook.

Before('@chromecast') do
  $chromecast = Chromecast.new
end

My Chromecast class has an initialize method that inserts the javascript into the page.

class Chromecast

  def initialize
    $capybara.execute_script <<-EOF
      var el=document.createElement("script");
      el.type="text/javascript";
      el.src = "https://gist.githubusercontent.com/sermoa/10988494/raw/82e08c5a29b5689b5e9f3d03c191b8c981102d85/fakeChromecast.js";
      document.getElementsByTagName("head")[0].appendChild(el);
    EOF
    @media_alive = true
  end

end

With this in place, so long as i set up our player with the relevant business logic that says casting is available, when i hover over the player, i get a cast button!

  @chromecast
  Scenario: Chromecast button appears
    Given Chromecast is available
    When I play media
    Then I should see the Chromecast button
A cast button appears!

A cast button appears!

So how does that work? I assure you, i don’t have a Chromecast on the network right now. I’m not using the Google Chrome extension. I’m actually running it in Firefox! What is this voodoo?!!

Have a look at the fakeChromecast.js file:

window.chrome = {};
window.chrome.cast = {};
window.chrome.cast.isAvailable = true;

See that? We’ve set up a Chromecast and said it’s available! Sneaky, hey? It’s that easy, folks! :)

The Standard Media Player will now attempt to set up a session request with its application ID. That’s fine: we’ll happily enable it to do its thing.

window.chrome.cast.SessionRequest = function(a) { }

Obviously a real Chromecast does something rather significant here. But we don’t have to care. This is a fake Chromecast. We only provide the function so that it doesn’t break.

Next, the media player makes a new ApiConfig. It’ll pass the session request it just obtained (in our case it’s null, but that doesn’t matter), and two callbacks, the second being a receiver listener. That’s the important one. We want to convince it that a Chromecast is available, so we trigger this callback with the special string “available”.

window.chrome.cast.ApiConfig = function(a, b, c) {
  c("available");
}

So Chromecast is available. Now suppose the user clicks the button to begin casting. This should request a session.

  @chromecast
  Scenario: Click Chromecast button and connect to a session
    Given I am playing media
    When I click the Chromecast button
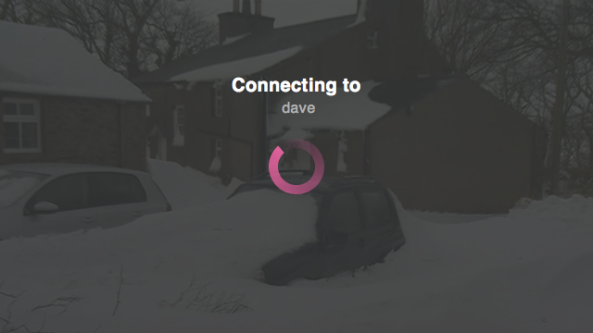
    Then I should see Chromecast is connecting
Connecting to Chromecast

Connecting to Chromecast

How did we do this? Easy! The media player requests a session, sending a success callback. Fake Chromecast store a references to that callback – on the window so that we can trigger it any time we like! The callback function is expected to provide a session. We send it a reference to a fake session, which is entirely within our control. Oh it’s all so much fun!

window.chrome.cast.requestSession = function(a, b) {
  window.triggerConnectingToCC = a;
  window.triggerConnectingToCC(window.fakeSession);
}

As the documentation says, “The Session object also has a Receiver which you can use to display the friendly name of the receiver.” We want to do exactly that. We decided to call our fake Chromecast Dave. Because Dave is a friendly name! :)

window.fakeSession = {};
window.fakeSession.receiver = {friendlyName:"dave", volume:{level:0.7}};

I think i found our app expected the session receiver to supply a volume too, so i added that.

The media player does some shenanigans with media that we don’t need to care about, but when it sends a request to load media it passes its callback to trigger when media is discovered by Chromecast. That’s another important one for us to keep, so we store that one. We wait 1 second for a semi-realistic connection time, and then trigger it, passing a reference to .. fake media, woo!

window.fakeSession.loadMedia = function(a, b, c) {
  window.pretendMediaDiscovered = b;
  setTimeout(function() {
    window.pretendMediaDiscovered(window.fakeMedia);
  }, 1000);
}

And now we are almost there. The last clever trick is the communication of status updates. The media player sends us a callback it wants triggered when there is a media status update. So we store that.

window.fakeMedia.addUpdateListener = function(a) {
  window.updateCCmediaStatus = a;
}

The magic of this is, we stored the references to fakeMedia and fakeSession on the browser’s window object, as well as the callbacks. This means the test script has access to them. Therefore the test script can control the fake Chromecast.

So you want Chromecast to report playing? Make it so!

  @chromecast
  Scenario: Begin casting
    Given I am playing media
    When I click the Chromecast button
    And Chromecast state is "PLAYING"
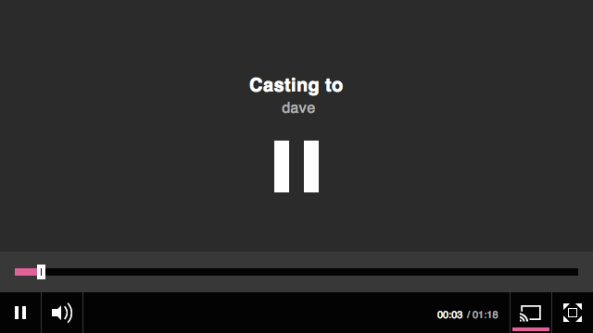
    Then I should see Chromecast is casting
We are casting!

We are casting!

What does that mean, Chromecast state is “PLAYING”? It’s pretty straightforward now, using the objects and callback functions that the fake Chromecast has set up:

When(/^Chromecast state is "(.*?)"$/) do |state|
  $chromecast.state = state
  $chromecast.update!
end

Those two methods get added to the Chromecast Ruby class:

class Chromecast

  def initialize
    $capybara.execute_script <<-EOF
      var el=document.createElement("script");
      el.type="text/javascript";
      el.src = "https://gist.githubusercontent.com/sermoa/10988494/raw/82e08c5a29b5689b5e9f3d03c191b8c981102d85/fakeChromecast.js";
      document.getElementsByTagName("head")[0].appendChild(el);
    EOF
    @media_alive = true
  end

  def state=(state)
    @media_alive = false if state == 'IDLE'
    $capybara.execute_script "window.fakeMedia.playerState = '#{state}';"
  end

  def update!
    $capybara.execute_script "window.updateCCmediaStatus(#{@media_alive});"
  end

end

Note that i had to do something special for the “IDLE” case because the media status update expects a true/false to indicate whether the media is alive.

So, using these techniques, sending and capturing events and observing reactions, i was able to verify all the two-way communication between the Standard Media Player and Chromecast. I verified playing and pausing, seeking, changing volume, turning subtitles on and off, ending casting, and loading new media.

This fake Chromecast is a lot faster than a real Chromecast, which has to make connections to real media. It’s also possible to put the fake Chromecast into situations that are very difficult to achieve with a real Chromecast. The “IDLE” state, for example, is really hard to achieve. But we need to know what would happen if it occurrs, and by testing it with a fake Chromecast i was able to identify a bug that would likely have gone unnoticed otherwise.

For the curious, here’s a demo of my Chromecast automated regression test in action!

This is all a lot of fun, but there is nothing quite like testing for real with an actual Chromecast plugged into a massive television!

Testing Chromecast for real

Testing Chromecast for real

So that’s how i test Chromecast. If you want to test Chromecast too, please feel free to copy and tweak my fakeChromecast.js script, and ask me questions if you need any help.

Getting chromedriver to work with Ruby selenium-webdriver under OSX Mavericks

I interrupt my soprano-saxophone-and-bass-guitar-playing evening to write very quickly about something that annoyed me today. I can’t find the fix anywhere else on the internet, so i guess it’s up to me to provide the solution.

Yesterday i upgraded to OS X Mavericks. Which is nice. Free upgrade, woo! Most things work well, though i had a few Java version issues.

Today i found that selenium-webdriver was not able to launch Chrome with chromedriver. It would open and immediately quit.

A quick google reveals that the workaround is to start chromedriver with the --verbose flag and then it magically works again. Which is true in my experience. But all the examples are for selenium wedriver called by Java or Python and i couldn’t find one for Ruby.

The first thing i did was upgrade selenium-webdriver gem to 2.37.0 and chromedriver to 2.4. I checked my version of Chrome; it is 30.0.1599.101 which is apparently up to date. When none of those things made any difference, I investigated the verbose option.

I thought i would just have to pass --verbose to the Capybara::Selenium::Driver via the args or switches option. But no. That will send the flag to Chrome when it launches, but i need the flag to be set on chromedriver.

Ruby open source to the rescue!

I poked around in the source code for service args and found this:

# selenium/webdriver/chrome/bridge.rb

module Selenium
  module WebDriver
    module Chrome

      class Bridge < Remote::Bridge

        # ...

        def extract_service_args(opts)
          args = []

          if opts.has_key?(:service_log_path)
            args << "--log-path=#{opts.delete(:service_log_path)}"
          end

          args
        end

        # ...

      end
    end
  end
end

Hmm, so the only service arg you can set is the --log-path. That’s no good.

Ruby monkey patching to the rescue!

In my cucumber features folder i made a support file to monkey patch that method, and add a possibility of sending any service args i like.

# features/support/selenium_webdriver_monkey_patch.rb

module Selenium::WebDriver::Chrome
  class Bridge
    def extract_service_args(opts)
      args = []
      args += opts.delete(:service_args) if opts.has_key?(:service_args)
      args << "--log-path=#{opts.delete(:service_log_path)}" if opts.has_key?(:service_log_path)
      args
    end
  end
end

Now in my env.rb file i just have to require the monkey patch file and i’m able to send the verbose flag.

# features/support/env.rb

# ...

require 'selenium-webdriver'
require 'selenium_webdriver_monkey_patch'

# ...

Capybara.register_driver :selenium_chrome do |app|
  Capybara::Selenium::Driver.new(
    app,
    browser: :chrome,
    service_args: ["--verbose"])
end

# ...

Hey presto, now i can set the verbose flag on chromedriver, and sure enough, it works. I am testing in Chrome again.

It seems a really horrible hack, and i hope a better solution is found soon, either from a Mavericks update, or chromedriver, or maybe selenium-webdriver will add this option for service args in a future version.

I still don’t really know why verbose works when normal mode does not. But there we go. I can test again tomorrow, and that makes me happy!

Now, back to my bass guitar! :)

Colemak and vim: “But what about h/j/k/l?”

I have my phone set to alert me when anyone mentions Colemak on twitter. It’s a fun one to follow, you get new people trying out Colemak at least once a week, and i love to encourage people.

One thing i see a lot is programmers talking about vim, and asking what you do about the h/j/k/l keys. Do you remap them or relearn them?

There is at least one person who has made a colemak-vim remapping plugin (see this discussion in the Colemak forum), but i can’t imagine it working well. If you try to put h/j/k/l back where you’re used to them then you have to find new homes for n, e and i. (h actually stays in the same place) As you may well know, if you’re reading this, n is next search match, e is end of word, and i gets you to insert mode.

So if you move those keys, where would you put them? Almost every letter in vim has some sort of significance, and many of them are chosen for the action they stand for, which is part of the power of vim.

My answer is to relearn them. Maybe it’s easy for me because i was on Dvorak when i learned vim, so i was never attached to the position of h/j/k/l in the first place. Curiously enough, in Colemak h/j/k/l all end up on the same finger: the index finger of the right hand. Some people complain that j and k feel upside down, and they do at first, but then you realise that Apple is busy rewiring our brains with “natural scrolling” (which i think is just awesome, by the way) and before you know it, Colemak and vim feel perfectly wonderful together!

So my advice: print out one of these Colemak/vim cheat sheets and just get used to it!

vi / vim graphical cheat sheet - Colemak version

Look! i’ve even done a typematrix version for all you Colemak people who pair program and need a keyboard with a hard wired Colemak switch!

vi / vim graphical cheat sheet - Colemak TypeMatrix version

Of course, the other great thing to note about Colemak is one of its big advantages over Dvorak: that punctuation characters remain in their QWERTY positions. Which is very useful for vim users! :)

Speak the phone’s language

I have long had a prejudice against tools that help you to write apps for mobile phones, especially the ones that claim you can write an app once and deploy it to multiple different platforms. My argument was that iPhone, Blackberry, Android, Windows Phone, etc, all have different user bases who expect different things. How can you write one app that works well across all platforms?

I recognised this as a prejudice, and realised that i hadn’t actually tried out the things that i was criticising. After watching a talk by coder, hacker and lecturer Syd Lawrence about PhoneGap and Sencha Touch, i realised that the time had come to test my assumptions.

Syd Lawrence – Mr Mobbles Magical Emporium from Event Handler on Vimeo.

An opportunity came along to develop an Android version of an app that already exists for iPhone. It’s quite a simple app, and on Monday last week i made a start.

I downloaded PhoneGap and installed the library into a new Android application. It provides you a very fast way to get up and running with an HTML5 app that runs locally on the phone. There are numerous javascript functions which translate into the phone’s native language to access things like the camera, GPS, accelerometer. You can also write native code and expose it to your javascript, for example i wrote a little bit of Java code to hide the soft keyboard, which i could call from javascript at the appropriate time.

To style the app, i used Sencha Touch which is an extension of Ext.js. It’s a very nice way of declaring components in javascript that look visually somewhat like a native app. I got the basic functionality together quite quickly: tabs, network connectivity with JSONP, a scrolling gallery of pictures.

It was nice to use tools i am familiar with: jQuery and CSS3. You can run your app in a browser as you are building it, and periodically just check it looks okay on a phone.

Progress was fast. I encountered a few obstacles, most notably cross-site-scripting limitations, and limitations of the pre-release Sencha Touch version 2 which meant i had to go back to the slower and older 1.1. But i managed to overcome every obstacle and within 4 days i had a basic functioning app.

All was great apart from one thing: performance. On my Android tablet the app took 3 seconds to load. On my entry-level phone it took 7 seconds initialising PhoneGap, Sencha Touch and jQuery. Just to load a page that does basically nothing until you start typing in it. I was also disappointed by the refresh when you rotate the phone’s orientation and it jerkily redraws the screen. It’s great as a proof-of-concept prototype, but it’s not something i’d be happy to release and put my name to it.

So on Friday i thought to myself, you know what? I’m going to see what it would take to rewrite this as a native Android app in Java. I spent a good deal of the weekend working on it and by Monday i had got it to approximately the same point as the PhoneGap/Sencha Touch version. I gave my client the option which to continue with, and together we chose to go ahead with the native app. We lost the ability to deploy to multiple platforms, which was something we were hoping for, but in return, we get a far more responsive, native look and feel high quality app that we can both be proud of.

There is a place for Sencha Touch: if i’m writing a mobile friendly version of a website i’ll definitely give it another try. But for an app that has been downloaded and installed, i feel that the users are justified in expecting something better. And to achieve the quality expected, at least for Android, you have to speak to the phone it its native language.

Beautiful CSS3 buttons with SASS

I had a very pleasant experience yesterday of making some nicely styled buttons with no background images, just pure CSS, using SASS to help me. What i’m about to share is by no means new or innovative, but i was impressed by it, so i decided i would write about it.

SASS = Syntactically Awesome Stylesheets

SASS is CSS styling for programmers. As programmers, we are basically lazy. We hate repeating ourselves. If we can find a way of making our lives easier, we will take it. I really like SASS for its mixin capabilities and colour manipulation, which i will demonstrate here.

Rails 3.1 Asset Pipeline

I’m really enjoying Rails 3.1 because it makes using SASS so simple. You add any files you like (CSS, SASS, SCSS) into app/assets/stylesheets and it compiles them all up into one CSS file. On a production server it minifies it too. It does similar magic for javascript files, which you’re now welcome to write in the very brilliant CoffeeScript. I love it!

So, then, buttons!

Let’s start with a nice HTML5 nav element containing a few links we want to turn into buttons.

<nav>
  <ul>
    <li><a href='/carrots'>Carrots</a></li>
    <li><a href='/pineapples'>Pineapples</a></li>
    <li><a href='/ginger'>Ginger</a></li>
  </ul>
</nav>

So this is what we start with:

Basic list alignment

First of all, let me do some basic manipulation to remove the bullet points and line them up side by side. Notice how with SASS (or SCSS) you can nest CSS definitions very nicely.

nav {
  ul {
    list-style-type: none;
    padding-left: 0;

    li {                                                                                                                                       
      float: left;
      padding: 0 5px;
    }   
  }
}

Add a background colour

It would be really good if these buttons had a background colour, say something very fetching like purple. While i’m here i’ll also change the text colour to white, make the text a bit bigger, and bold, and add some padding.

nav {
  ul {
    list-style-type: none;
    padding-left: 0;
  
    li {
      float: left;
      padding: 0 5px;
  
      a {
        background-color: #618;
        font-size: 1.1em;
        font-weight: bold;
        color: #fff;
        padding: 4px 16px;
        text-decoration: none;
      }
    }
  }
}

The neat thing about SASS is we can start to take this styling out into a mixin module:

@mixin button-style($base-color) {
  background-color: $base-color;
  font-size: 1.1em;      
  font-weight: bold;     
  color: #fff;
  padding: 4px 16px;     
  text-decoration: none; 
}

nav {
  ul { 
    list-style-type: none;
    padding-left: 0;   

    li {
      float: left;
      padding: 0 5px;    

      a {
        @include button-style(#618);
      }
    }
  }                                                                                                                                            
}

Rounded corners

Now obviously, buttons need rounded corners, don’t they! I can write a mixin for that:

@mixin rounded-corners($radius) {
  -webkit-border-radius: $radius;
  -moz-border-radius: $radius;                                                                                                                 
  border-radius: $radius;
}

@mixin button-style($base-color) {
  background-color: $base-color;
  font-size: 1.1em;
  font-weight: bold;
  color: #fff;
  padding: 4px 16px;
  text-decoration: none;
  @include rounded-corners(5px);
}

Box shadow

A bit of subtle shadow lifts the buttons off the page a bit:

@mixin box-shadow($h, $v, $radius, $spread, $color) {
  -webkit-box-shadow: $h $v $radius $spread $color;
  -moz-box-shadow: $h $v $radius $spread $color;
  box-shadow: $h $v $radius $spread $color;
}

@mixin button-style($base-color) {
  background-color: $base-color;
  font-size: 1.1em;
  font-weight: bold;
  color: #fff;
  padding: 4px 16px;
  text-decoration: none;
  @include rounded-corners(5px);
  @include box-shadow(1px, 1px, 3px, 0, #333);                                                                                                 
}

Text shadow

Some text shadow could also be quite nice. Notice as i’m going along i am building up SASS mixins that i can easily use in other places.

@mixin text-shadow($h, $v, $radius, $color) {
  text-shadow: $h $v $radius $color;
  filter: dropshadow(color=$color, offx=$h, offy=$v);
}
  
@mixin button-style($base-color) {
  background-color: $base-color; 
  font-size: 1.1em;
  font-weight: bold;
  color: #fff;
  padding: 4px 16px;
  text-decoration: none;
  @include rounded-corners(5px);
  @include box-shadow(1px, 1px, 3px, 0, #333);
  @include text-shadow(1px, 1px, 2px, #000);                                                                                                   
}

Gradient and colour manipulation

Now here’s a clever trick. To make the button more 3D i can apply a gradient, using a lighter version of the base colour that was passed in. Here SASS becomes really helpful.

@mixin linear-gradient($from, $to) {
  background-image: -webkit-gradient(linear, 0% 0%, 0% 100%, from($from), to($to));
  background-image: -webkit-linear-gradient(top, $from, $to);
  background-image:    -moz-linear-gradient(top, $from, $to);
  background-image:     -ms-linear-gradient(top, $from, $to);
  background-image:      -o-linear-gradient(top, $from, $to);
}

@mixin button-style($base-color) {
  background-color: $base-color;
  font-size: 1.1em;
  font-weight: bold;
  color: #fff;
  padding: 4px 16px;
  text-decoration: none;
  @include rounded-corners(5px);
  @include box-shadow(1px, 1px, 3px, 0, #333);
  @include text-shadow(1px, 1px, 2px, #000);
  @include linear-gradient(lighten($base-color, 10%), $base-color);                                                                            
}

A sneaky little tip: reverse the gradient on hover. It gives a tactile feedback. You could also darken the box shadow if you wanted a different effect.

The hover gradient reverse made me realise that the buttons could do with a slight border. I’ll use 10% darker than the base colour. I’ll give a 1px border, but 2px or even 3px would also look cool, for a really bold effect.

@mixin button-style($base-color) {
  background-color: $base-color;
  font-size: 1.1em;
  font-weight: bold;
  color: #fff;
  padding: 4px 16px;
  text-decoration: none;
  border: 1px solid darken($base-color, 10%);                                                                                                  
  @include rounded-corners(5px);
  @include box-shadow(1px, 1px, 3px, 0, #333);
  @include text-shadow(1px, 1px, 2px, #000);
  @include linear-gradient(lighten($base-color, 10%), $base-color);

  &:hover {
    @include linear-gradient($base-color, lighten($base-color, 10%));
  }
}

Imagine you are hovering over the carrots button:

Inner glow

To show a different effect, you could inset the box shadow with a lighter colour to give a highlight. You can have two box shadows, but it’ll clutter up my mixins, so i’ll leave you to figure that out on your own if you want both the highlight and the shadow.

Oh, i’ve increased the border and the rounded corner radius to emphasise this effect:

@mixin inset-box-shadow($h, $v, $radius, $spread, $color) {
  -webkit-box-shadow: inset $h $v $radius $spread $color;
  -moz-box-shadow: inset $h $v $radius $spread $color;
  box-shadow: inset $h $v $radius $spread $color;
}

@mixin button-style($base-color) {
  background-color: $base-color;
  font-size: 1.1em;
  font-weight: bold;
  color: #fff;
  padding: 4px 16px;
  text-decoration: none;
  border: 2px solid darken($base-color, 10%);
  @include rounded-corners(7px);
  @include text-shadow(1px, 1px, 2px, #000);
  @include linear-gradient(lighten($base-color, 10%), $base-color);
  @include inset-box-shadow(0px, 1px, 2px, 0px, lighten($base-color, 50%));

  &:hover {
    @include linear-gradient($base-color, lighten($base-color, 10%));
  }
}

The triumphant finale

I now have some button styles that i can apply wherever i want them. Because i used SASS to manipulate the colours, i only need to pass the base colour and it will apply a nice gradient, borders and glow.

So still without changing the original HTML, i can do this:

@mixin green-button {
  @include button-style(#152);
}

nav ul li:first-child a {
  @include green-button;                                                                                                                       
}

And you see, i now have a green-button mixin that i can happily apply to any link i want to! This is why i like SASS: it turns styling into programming! :D

I should say, i know these aren’t the prettiest buttons. I am more interested in the technique than the design, and i’m making them less subtle than they would ideally be, to prove the effect. When i figured out these techniques this week i was privileged to work from a gorgeous design by John Ryan, and the results turned out much prettier than these! :)

Resources

Here are a few useful resources to do with CSS3 and button generations:

Demeter – It’s the Law!

This post is slightly too much for a tweet.

I have just been skim-reading Demeter: It’s not just a good idea. It’s the law. by Avdi Grimm. I like the message that they didn’t call it The Suggestion of Demeter.

I really liked when i got to the Peter Van Rooijen interpretation of Demeter’s Law. I have never seen it explained quite so effectively!

  • You can play with yourself.
  • You can play with your own toys (but you can’t take them apart).
  • You can play with toys that were given to you.
  • And you can play with toys you’ve made yourself.

Okay, back to work. I just wanted to record that because it was so brilliant. I will read the article in greater detail later.

Seven Languages kick-off

We had a skype call today to meet some of the people who are going to be studying Seven Languages in Seven Weeks together. Attending today were Daniel, Susan, Sarah, Matthew, Dirk and Matt. There are some people who couldn’t make it today and a few who have signed up since, so we’re going to have a similar skype call tomorrow (sunday) at 8pm BST.

We introduced ourselves and talked about our experiences and what we each want to get out of the seven weeks. We discussed briefly what we already know about the languages we’ll be studying.

We talked about tools we can use to encourage each other.

Susan has made a very useful git repository that we can fork and use to work in: github.com/mbbx6spp/7languages7weeks. There is a branch with all the examples from the book, and a branch where you can publish a blog to github pages. That might be a very good way to keep a record of your thoughts as we go.

Matt has set up a shared folder in Google Docs for us: 7 languages in 7 weeks. It is publicly viewable. I like learning in public. If you want write access, please tell me or Matt your google email address.

There is a twitter list of the people who have committed to studying: twitter.com/sermoa/sevenlanguages. You can use that to get to find the people we’re studying along with.

It feels like there is a lot of excitement about the forthcoming seven weeks, and a lot of anticipation for what we’ll be learning. I was thrilled when i peeked ahead in the book and saw we’ll be using Prolog to solve a Sudoku! I can’t wait for that!

I’ll be blogging here a lot about what i’m learning. If you’re not studying with us, i hope you’ll still feel involved just by reading about it.

So, to all participants and followers … here’s to a great seven weeks! Have fun! :D

7 languages in 7 weeks

Thank you for all the response over twitter about studying Seven Languages in Seven Weeks. We are going to start a study group on monday. You can participate from anywhere in the world. Here’s how i think it could work.

My ideas

We should have a get-together over Skype each weekend (starting tomorrow if possible!) in which we discuss the coming language, any tips for installing, share any prior knowledge of the language. In later weeks we can also start discussing languages we’ve studied, compare and contrast them, and share how we feel about what we’ve learnt.

During the week there is text to read and exercises to study and try out. You should be responsible for your own studying. Being busy is not an excuse: if you really want to do this you’ll make time. Personally, my schedule is insanely busy next week. It would be very easy for me to put this off and say it’s not a good time. But if i do that, when will it ever be a good time? We have said we want to do this, so let’s do it!

Please blog a lot about what you’re learning. It will help provide discussion points for the weekend skype chat.

Tweet a lot. I have decided that the hashtag will be #7languages7weeks – it’s the shortest it can be while still being meaningful!

Get the book

If you haven’t yet bought the book, you need to do that straight away now! There is still time to buy it from Amazon and get it delivered on time, but HURRY!

If you want to get it for Kindle or other e-reader you can order it directly from Pragmatic Bookshelf choosing the eBook format.

Sign up now

I want to know who is serious about this, so please sign up here:

I propose we have a skype call at 13:00 British Summer Time tomorrow. If that doesn’t work for you, please let me know straight away and we’ll see what works better.

If you think any of my plans could be improved, tell me. Let’s iterate on this until we get something that really works well.

Talk to me on twitter @sermoa or add me on skype – also sermoa.

Hope to skype chat with you tomorrow! :)

Exposing my ignorance

I have been encouraging my apprentice Rohit to blog about ignorance. It’s great to talk about what you know, and what you can do well, but for people to really trust you it’s important also to be honest about what you don’t know yet, and what you’re looking to learn.

As software crafters learning is part of what we do. There is always more to learn; it never stops. Personally i really enjoy learning. I love the feeling of new information going in and being absorbed.

Since i asked Ro to blog about exposing ignorance, i thought i should do the same. It’s good to start with a review of where you are now.

Where i am now

It’s fair to say my strongest language is Ruby. I’ve been programming in Ruby for about 5 years, i’ve seen my style grow and change a lot. I feel very confident in domain modelling and object orientation using Ruby.

I’m pretty confident with behaviour driven development for Ruby, using Cucumber and Rspec. I know a lot about Rails and a fair amount about Sinatra. I am comfortable using MySQL, PostgreSQL and MongoDB.

Exposing my ignorance

My biggest weakness at the moment is in having only one strong language. And here is where i expose my ignorance. I know a bit about a few other languages, but i’m not where i want to be. I feel embarrassed when people talk about Java, Haskell, Scala, Io, and i am unable to contribute due to my lack of knowledge.

Confronting my ignorance

Since thinking about this blog post, i have already begun confronting my ignorance: my first step was to contact Joel Gascoigne who develops Buffer – a simple tool for scheduling tweets. I wanted an easier way to use Buffer on my phone, so i offered to make an Android app. I saw this as a pet project to get me learning a bit more about Android development in Java.

The app is open source; you can check it out on github.com/bufferapp/Android. A simple working version is now available in the Android Market: Buffer for Android.

We have a few ideas for moving the app forward, but for now i’m happy that we’ve got something out there that works, and it has given me the confidence to develop more Android apps.

My next tactic will be to study the book Seven Languages in Seven Weeks: A pragmatic guide to learning programming languages, by Bruce A. Tate. This is an intensive study of Ruby, Io, Prolog, Scala, Erlang, Clojure and Haskell. By learning how to solve a non-trivial problem in each of these languages, we learn the unique strengths and weaknesses of each language.

I’m looking for other people to study along with me, so if you’re interested, let me know!

Once i’ve studied those seven languages, i want to learn some Python. I’ve been hearing a lot about Python lately, and it seems like a language i really want to know. I already have the book Learning Python by Mark Lutz and i look forward to getting to that.

So that’s me: i have listed my strengths, exposed my ignorance and outlined how i am confronting it to improve myself and learn more. What about you?

MongoDB and Merlin’s Castle

Recently i have been occupying my free time writing a remake of a game i used to play at school. It is called Merlin’s Castle, and it’s a text-based adventure game where you move around in the world, picking up items to overcome obstacles. It’s great fun!

You can play Merlin’s Castle at http://merlinscastle.net.

Last week Russell Smith visited eden to pair for a day, and we got talking about MongoDB, a document oriented database. I had already been thinking about switching Merlin’s Castle to a document oriented database, so it seemed a good opportunity to try out MongoDB with Russell’s help.

I found it was very easy to switch over to MongoDB using the MongoMapper Ruby object mapper gem. I have found many benefits of switching over to MongoDB, so yesterday i did a tech talk to share how i did it, and what i learned from it.

You can watch my presentation at http://vimeo.com/17815778.

I like document oriented databases – they make a lot of sense to me. I used to work with Lotus Notes a long time ago. I also tried out CouchDB a few years ago. I’m very pleased to have an application that uses MongoDB, and i’m sure i’ll be using it again in the near future.